Posts

MX Financial Brand Forum 2018 Booth

Spotlight : MX Booth Financial Brand Forum 2018

This week, we’ll focus on a booth that is near and dear to our hearts for many reasons, one of which is the stellar and eye-catching lighting: the MX booth at the Financial Brand Forum 2018. We had to think outside the box to come up with a lighting installation that would combine haphazard with clean, intentional with accidental. Anyone familiar with framework or construction in general knows that creating a piece with odd intersecting angles can be a challenge to say the least and takes a very unique mind.


Be Bold (and Bright)

mackenzie EXHIBIT has a tendency to enjoy going above and beyond on our booths, and luckily we have clients like MX that are happy to go along with us on the crazy journey that leads to creating something truly beautiful. At an event that has a tendency to lean more toward traditional, we created a booth that stood out from the rest — and not just because of its two-story structure.

“This two-story 20×30 island exhibit booth was a first for The Financial Brand Forum. It literally took exhibits to the next level, with two conference rooms for private meetings upstairs — both impressive and gorgeous!” — The Financial Brand

For us, what really took this booth above and beyond was the lighting. Ranging from a stark and clean back-lit MX logo to a panel of no less than nine television screens that acted as a single unit to perhaps the most visually interesting pieces of the whole exhibit: a lighting installation that looks almost like pickup sticks scattered across a floor, but created larger-than-life and brightly lit from behind.

Watch the video below to see the MX booth come to life from start to finish.

Why We Do It

Of course we want you to watch the entire video to see what went into the design, construction, and completion of the MX booth, but if you’re pressed for time, go ahead and fast forward to around the 2:15 mark. That’s why we do what we do — the look of joy and shock on our customers’ faces when they see their booth for the first time. The sense of pride that clients feel standing in their booth at a show and thinking, “yeah, this is my company and it’s the coolest thing around.” The ability to bring happiness from constructive chaos. There isn’t another industry quite like the exhibit design industry, and there’s no place mackenzie EXHIBIT would rather be.


MX Booth Inspiration

Has this gorgeous booth inspired you to set up your trade show game? Good — we’re here to help. Reach out to us here and let our creative geniuses get to work on developing a booth that will make you feel the way our client did in the video above.

Custom designed Trade Show Booth

Spotlight : Toad&Co Outdoor Retailer Summer 2018 Booth

There are tons of companies jumping on the sustainable/eco-friendly/upcycled/[insert additional buzzwords here] bandwagon because it’s all the rage and is a good way to gain some public favor. Amidst all the noise of these wannabe greenies, there stands a company that is walking the walk . . . or should we say recycling the recyclable. This mackenzie EXHIBIT Spotlight is dedicated to the one and only Toad&Co and everything they (and their award-winning booth) stand for.


Put Your Money Where Your Values Are

Plenty of companies incorporate sustainability into their workplace through providing recycling bins, using upcycled office materials and furniture, etc. — but very few carry that commitment through to their trade show booths. Trade show booths are all about saving weight, ease of assembly/disassembly, and beautiful aesthetics, but until now the green movement hadn’t quite caught up to this space. Enter: Toad&Co and mackenzie EXHIBIT, a match made in environmentally-conscious heaven.

It’s one thing to create a trade show booth that is made from sustainable materials — it’s an entirely different undertaking to make it beautiful. Thanks to the dedication and imagination of the team here at mackenzie EXHIBIT paired with the unwavering commitment of Toad&Co, we were able to deliver a newsworthy and enviable trade show booth design that made a minimal impact on the planet’s natural resources. Read on to learn more about the specific elements we incorporated to make this vision a reality.


Toad&Co ORSM 2018 Image

Image of award-winning Toad&Co Outdoor Retailer Summer Market booth by mackenzie EXHIBIT.


Old Materials, New Tricks

Here’s a closer look at some of the materials that went into creating the Toad&Co Outdoor Retailer Summer Market trade show booth:

  • Cork — In some ways, cork is the holy grail of eco-friendly materials in that it is both renewable and recyclable. Cork trees are not cut down in the process of harvesting the material, rather, their bark is stripped away which then regenerates. These beautiful trees can live up to 200 years while still providing materials to be turned into flooring, siding, bottle closures, and more. If you take a look at some of the pictures here, you’ll see that we used cork as wall paneling on the Toad&Co booth.
  • Falconboard — Falconboard is a rigid graphics media board that is a fully recyclable alternative to the foam boards that have traditionally been used in exhibit design. This incredibly functional board is made from renewable forest resources and is 100 percent recyclable. When checking out pictures of the Toad&Co booth, you’ll see Falconboard used as the facing on much of the cabinetry.
  • Beetle Kill Pine — Many companies want an all-natural wood look, but we took that a step further with Toad&Co by using beetle kill pine for structural and design elements of the booth. This material is exactly what the name suggests — pine that has already been killed by the voracious pine beetle that’s been sweeping through the Rocky Mountains for years. Rather than cut down healthy wood for booths, we prefer to use this already-dead pine that looks just as good as normal pine but doesn’t negatively impact the landscape because the trees already need to be cleared to make room for new growth.
  • Steel — The steel that mackenzie EXHIBIT uses is made from 98 percent post-consumer scrap, so it was a given that we use this material throughout the eco-friendly Toad&Co booth. As with many of the features in the booth, we left this recycled steel unfinished to give it a raw and rustic appearance and to minimize the use of toxic products.

Toad&Co ORSM 2018 Final Rendering

Final rendering of the Toad&Co Outdoor Retailer Summer Market 2018 booth.


What’s Missing

What Toad&Co decided not to use is in some ways just as important as what they decided to use. Many of the materials used in creating this booth were left unfinished — and no, we don’t mean that we stopped making them halfway through — unfinished as in there were no harsh chemicals used to treat the finished product. The steel, beetle kill pine, etc. is all left in its original and natural beauty so as to let the character of the material itself show through while also cutting back on the harmful chemicals required.


What’s It Worth to You?

While there’s no simple math to tell you that a sustainable booth will cost you “x” amount more than a traditional booth, it’s worth mentioning that recycled and renewable materials do generally cost more than their standard “brand new” counterparts. What this means is that it all comes down to where your values fall as a company — would you rather spend a little more to create something that you can feel good about when you unveil it at a show, or something that makes your eco-conscious side cringe? As with anything, there is a give and take depending on what means the most to you, and mackenzie EXHIBIT will be glad to work with you to come up with a solution that can fit both your wallet and your ideals.


Toad&Co ORSM 2018 Initial Design

Initial design for Toad&Co’s Outdoor Retailer Summer Market 2018 booth.


Leading by Example: Toad&Co 

The Toad&Co booth serves as a beautiful reminder to everyone who sees it that sustainability is within reach for all of us. By thinking ahead and being creative, we can all incorporate more eco-friendly measures into our daily lives. Whether you’re a business owner who needs a little nudge to start recycling your company’s paper waste or you’re an individual who has been wanting to teach your children about creative ways to reuse household items, we hope that the Toad&Co Outdoor Retailer Summer Market 2018 booth will inspire you to take the leap and go green.


Ready to get to work creating a trade show booth that will perfectly showcase your company’s values? Great! Drop us a line here and we’ll be happy to make your vision a reality.

Lightheaded Lighting Trade Show Booth Ideas 3

How to Be a Good Client

Turns out, sitting down and saying you want a booth that’s “cool” isn’t the best way to be a good client and get the result you want. This blog post covers what you should tell your booth company in order to get your ideas across, down on paper, and into real life. We’ll also go over how involved you should plan to be vs. when you should step back and leave the professionals to do their thing, general timelines to expect, and more.


Be Blunt

If you’ve chosen a tried-and-true booth company like mackenzie EXHIBIT, then the professionals you’re working with are just that — professionals. They don’t need you to take their feelings into account when giving input, they truly want to know what needs to be done to make you happy, and above all, they’re not mind readers. Go into all of your meetings with the exhibit design company with a clear understanding of what you want to achieve and what is necessary in order for you and your coworkers to consider the booth a success. During the ideation phase, your booth company might present you with some ideas that are outside of what you first had in mind — if you like them, great! If you don’t, then be blunt and speak your mind. The more transparent you are with the company, the better the end result will be.

Be Precise

Strike the words “kind of”, “maybe”, “sort of”, and “you know what I mean?” from your vocabulary before going into meetings with the booth design company. Even the best exhibit design companies can’t extract useful information from those phrases, and all you’ll end up with is confusion and potential delays. It’s ok to go into the meetings with an open mind and embrace the collaborative nature of booth design, but even while having a productive back-and-forth discussion you should try to be as clear as possible with the input you’re giving. If the ideation phase of your booth design is producing results that aren’t exactly what you wanted, stop and take a moment to look back and see if there were ways you could have been more precise and then adjust moving forward. Yes, the customer is always right . . . but they’re not always clear.

Don’t Hover

Don’t be a helicopter client. Hovering over your exhibit design company by emailing them every day, calling them incessantly, and requesting in-person meetings multiple times per week isn’t going to speed the process along (actually, it’ll do the opposite). They know that this booth is your baby, and these people are literally trained professionals. They have your best interest at heart; creating your dream booth is a win for them as much as it’s a win for you, because your booth serves as an advertisement of their abilities to potential clients. Be a good client and stick with your once-per-week check ins, but otherwise leave the pros to do what they’re good at. If they’re a little slow on the response, take that as a sign that they’re busy working hard on creating the best booth possible.

Mo Money, Mo Billing Schedules

One of the best ways to make sure your booth stays on track and be a good client is to stay on top of your bills. Some of the larger exhibit design companies might be able to float you for a 30-day billing period if your company has a unique payment schedule, but for the most part, pay up when it’s due. In general, a 50% deposit will be required once your booth budget is agreed upon by both you and the exhibit design company and your contract is signed. The remaining 50% will be due within 30 days after the trade show has wrapped up. Keep this in mind when coming up with your budget, make sure to give your Accounting department a big ol’ heads up, and everything will go swimmingly. This schedule can vary from company to company but is a good guide to keep in mind when figuring out when certain things will hit your budget.

Timing is Everything

You only need a few months to throw together a kickass booth, right? Well, maybe if you have a time machine to rewind by a few more months. No time machine? Then you’d better start at least six months prior to when the trade show is happening. Larger booths with more intricate designs should be given eight months up to a year of prep time in order to make sure designs can be finalized, materials can be sourced, iterations can be reviewed, and all details can be put to bed. This is especially true if this is your first time working with the exhibit design company. If you’ve worked with a company before and plan to reuse pretty much the same booth design, you might be able to shave your timeline down to three or four months to make sure everything is in order, but we still suggest at least opening the dialogue six months in advance.

How to Be a Good Client

Speak your mind. Know what you want. Let the pros do their thing. Keep your finances in order. Be on time. Follow these five things, and you’ll be well on your way to being the dream client that every exhibit design company hopes to have.

Did this just make you realize that your trade show is five months away and you don’t have a booth? Panic a little, breathe into a paper bag, then give us a call at 801-621-7500 or email us here.

Building Materials and Finishes for Trade Show Booth

Building Materials and Finishes

Everything is not as it seems here at the mackenzie EXHIBIT warehouse . . . In this article, we’ll take a closer look at the magic that goes on behind the scenes and explore the building materials and finishes used to make our clients’ dreams come to life.


You Dream It; We Do It

Every beautiful booth we’ve created has started at the same place: the imagination of our clients. From there, we take the mockup, sketch, idea board, or even Pinterest inspiration you give us and create a real-world version of what’s previously been trapped in your mind. We welcome all input from our clients during this process as we work together with the single goal of creating a mind-blowing end result that will wow your trade show attendees and create a lasting brand impression.

Once you’ve given us your initial inspiration, we’ll set to work coming up with out-of-the-box ways to achieve that desired result. As our exhibit esthetics extraordinaire Chris Larsen says, “That’s the creative side of us.”

Let’s take a look at some of the materials we use and the techniques applied to get the desired end result while saving time, money, and weight — the trade show trifecta.


Faux Brick and Stone

Building Materials and Finishes

Faux Brick

Real stone masonry is no friend to the exhibit industry — it’s heavy, time consuming, and does not travel well. To get this same look while using trade show-friendly building materials and finishes, we turn to our good friend foam. The above picture is an example of how foam can be injected into a mold and then finished with your desired color treatment to achieve an end result that is shockingly lightweight while still giving you the artisanal look of stone masonry. Trying to recreate the look of a low stone wall in the English countryside or want your structure to have a cobblestone pathway through it? Faux bricks and stones made from foam are the answer.


Steel the Spotlight

Building Materials and Finishes

Galvanized Steel

Galvanized steel is amazingly versatile for all types of trade show exhibits. Whether you’re a tech company looking for a clean and cutting-edge vibe or you’re an outdoor industry brand wanting to convey a more earth-toned and weathered look, galvanized steel is a great option. The thin profile of this material allows us to save weight and cost while still giving you the unbeatable look of metal. Here you can see a before and after of corrugated galvanized steel — on the left is brand new; on the right is after we’ve allowed it to naturally rust outdoors for two days. We can also apply an acid wash to create a more targeted and stylized patina. Thanks to a variety of available patinas and rusting methods, galvanized steel ranks toward the top of our favorite building materials and finishes.


Concrete or Not-crete?

Building Materials and Finishes

Concrete and Faux-Concrete Comparison

So not-create isn’t really a thing, but it sounded funny, right? Either way, we invite you to take a guess at which of the above panels are concrete and which are lightweight substitutes. Can’t tell? Good — that’s the point! Concrete is great for permanent installations where weight isn’t an issue, but in the trade show world, weight is king. Using lightweight faux concrete saves you money on shipping and makes your exhibit much easier to put together and take down, which also saves time. No list of building materials and finishes would be complete without faux concrete; get creative in your trade show booth design by using this as a wall, pathway, product display, or any number of other options. As concrete can be considered one of, if not the most commonly used building material in recent times, finding a reliable supplier may not be as difficult. You could either search on the web for sites such as https://concreteprosatlanta.com/ or even contact a local supplier for the type of concrete you want.


Embrace the Aging

Building Materials and Finishes

Antique Wood

As the sustainability movement continues to grow, so does the demand for reclaimed and antique wood. mackenzie EXHIBIT partners with Trestlewood in Brigham City, UT, to give our trade show booths that beautiful weathered look by reusing antique flooring, hand-hewn timbers and beams, barnwood siding, and more from the local area. We also like to use Beetle Kill Pine from the Rocky Mountain region so that we can preserve as much healthy forest as possible. Beetle Kill Pine is caused by the pesky pine beetle which leaves a wake of dead trees. In order to make room for healthy new growth, this pine is harvested for use in building materials such as those used by mackenzie EXHIBIT. By utilizing Beetle Kill Pine we can help to restore our forests while at the same time giving our clients the beautiful wood finish they desire. Still want a weathered look even though you’re using new Beetle Kill Pine? No worries! We use a vinegar solution to give the new pine an aged look for an antique result in a hurry.


Building Materials and Finishes

Steel, concrete, wood, brick . . . these are just a handful of the materials we can use, recreate, or up-cycle to create your ideal trade show booth. Bring us your inspiration for your ideal trade show booth design and then let us put our decades of experience to work as we bring your ideas to life.

Ready to get started or have some more detailed questions on the booth design process? Give us a call at 801-621-7500 or email us here.

Custom-Trade-Show-Exhibits-SilencerCo

Create the Best Trade Show Booth Design

Creating the best trade show booth design is no small task — there’s a lot to keep in mind. What do you want people to feel when they first walk into your booth? Should they feel cozy and enclosed, or open and free? Do you want to have an on-site meeting space, or will you have a conference room reserved elsewhere? In this article, we’ll take a look at these and other considerations to take into account when creating the best trade show booth design.

Enclosed vs. Open

There are two main types of booth designs: enclosed and open. This is one of the first design element decisions you’ll need to make, and it’s a big one! This will determine the overall feeling of your booth and what the client experiences when they first step into your floor space. We’ll take a look at two trade show booth examples to show you the potential benefits of each style.

Custom-Trade-Show-Exhibits-SilencerCo

SilencerCo Trade Show Booth by mackenzie EXHIBIT

Here we see an enclosed trade show booth by mackenzie EXHIBIT. This particular design won the Best Booth Award at SHOT Show, and it’s easy to see why. This was considered the best trade show booth design because it completely altered the attendee’s experience from the moment they entered the space. All experiential elements were controlled, from the lighting to the flow to the flooring underfoot. An enclosed booth design allows you to create a completely custom experience regardless of the exhibit hall your booth space is located in. This design also ensured that all focus was solely on the products that were displayed — no focus was lost on neighboring booths, loud passersby, or any other distractions.


Trade Show Booth Ideas Zagg 2

ZAGG Trade Show Booth by mackenzie EXHIBIT

On the opposite end of the spectrum is this ZAGG booth design. The objective here was to create a free-flowing space that allowed the attendee to explore at their own pace and leisure. It welcomed flow-through from various angles and had several “pods” of product display spaces, which in turn allowed potential customers to take their time and feel like they had the space to interact with the booth as they liked. The separate counter spaces and open design also enabled ZAGG sales team members to have focused product showcase areas where they could give undivided attention to potential customers.


Enclosed and open booth designs yield very different attendee experiences. Think through the vibe of your company and the experience you want your customers to have before deciding which one of these great design styles to go with.


Meeting Spaces

The trade show floor can be a busy, noisy, and bustling place. Trying to have an important meeting while standing in the aisles is nearly impossible, not to mention unprofessional. It’s crucial to have space for your sales team and product managers to meet with clients and end users, which is why the best trade show booth design should include a dedicated meeting space.

Salewa Trade Show Booth Ideas 3

Salewa Trade Show Booth by mackenzie EXHIBIT

Salewa opted for a meeting space that pulled double duty as both a product display area and an out-of-the-way spot to have focused discussions. Thanks to some clever brainstorming, they also managed to include a backlit wall in their product display which gave the space a warm ambient glow. A meeting space that is adjacent to a product display allows you to easily grab specific products and replace them once the meeting is over, keeping things efficient and effective. A space like this one also clearly says “this is a spot for business” and doesn’t really invite people to loiter around, which helps to keep your day moving along smoothly.


Arcteryx Trade Show Exhibit Ideas 4

Arc’teryx Trade Show Booth by mackenzie EXHIBIT

If your booth space has the room for it, adding a second-story meeting area is a great way to preserve the first floor for product displays while still having plenty of room to meet with clients. A second-story meeting space has a very grand presence about it, which also helps to elevate the perception of your brand as a major player. This type of meeting area feels more like a lounge space and invites people to take a break from the show floor, which is perfect if you want to create a relaxing place to have sit-down discussions. Just be sure to double check the fire codes and exhibit hall guidelines to make sure you’re allowed to build a booth of this height in your particular space.


Product Displays

Product displays can be as unique and varied as the products they contain. Do you want to replicate an in-store shopping experience? Are your products small and expensive and need to be secured? Versatile trade show booth design companies like mackenzie EXHIBIT can craft a product display to suit your exact needs.

Custom Trade Show Display Suunto

Suunto Trade Show Booth by mackenzie EXHIBIT

Suunto watches are in-demand, have a higher price point, and are very portable — all of this combines to make them something that can easily “walk away” during a busy trade show. To cut down on the risk of product loss during the show, Suunto opted for a product display case that fully enclosed the products while still clearly showcasing them at every angle. A standalone case such as this one can be easily incorporated into any trade show booth design and allows attendees to get a great look at your products without sticky fingers becoming an issue.


Trade Show Booth Ideas Neve

Neve Trade Show Booth by mackenzie EXHIBIT

Neve clothing wanted a product display that pulled double duty — they needed to show their products on mannequins while also creating an in-store vibe with their booth space. For all wearables, it’s crucial to show various ways in which a customer can use the products while also allowing potential clients to browse through a large volume of items. Displaying everything on mannequins isn’t an efficient use of space, so here we combined the mannequin method with an on-the-rack display to simulate a shopping experience. This product display allowed for the greatest use of space while still effectively showcasing a wide range of designs.


Creating the Best Trade Show Booth Design

There isn’t a single cookie cutter answer for how to create the best trade show booth design — it all comes down to your company’s booth space, product requirements, and, most importantly, how you want attendees to feel when they enter your booth. Luckily, by teaming up with an experienced trade show booth design company such as mackenzie EXHIBIT, you’ll have access to decades of experience in best practices for how to create a stunning booth display.

To make sure you’ve crossed the t’s and dotted the i’s on your trade show booth design, head over to our article about the Top 5 Most Overlooked (But Crucial) Booth Elements.


Ready to get started or have some more detailed questions on the booth design process? Give us a call at 801-621-7500 or email us here.

Interactive Trade Show Booth Design

Creating a Trade Show Booth Part 4: Show Time

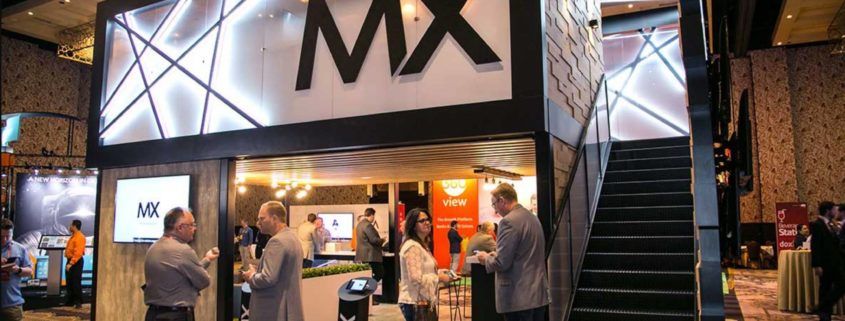
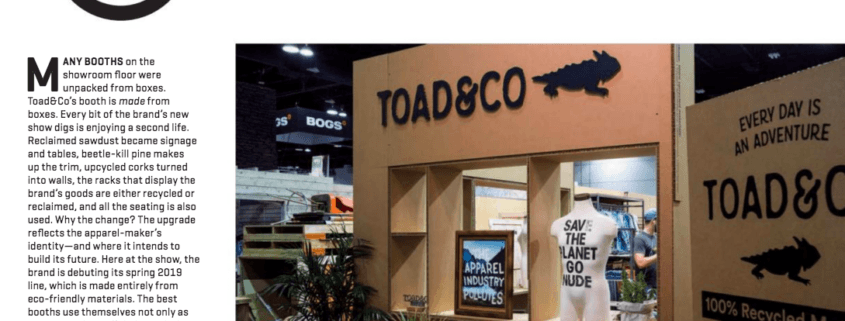
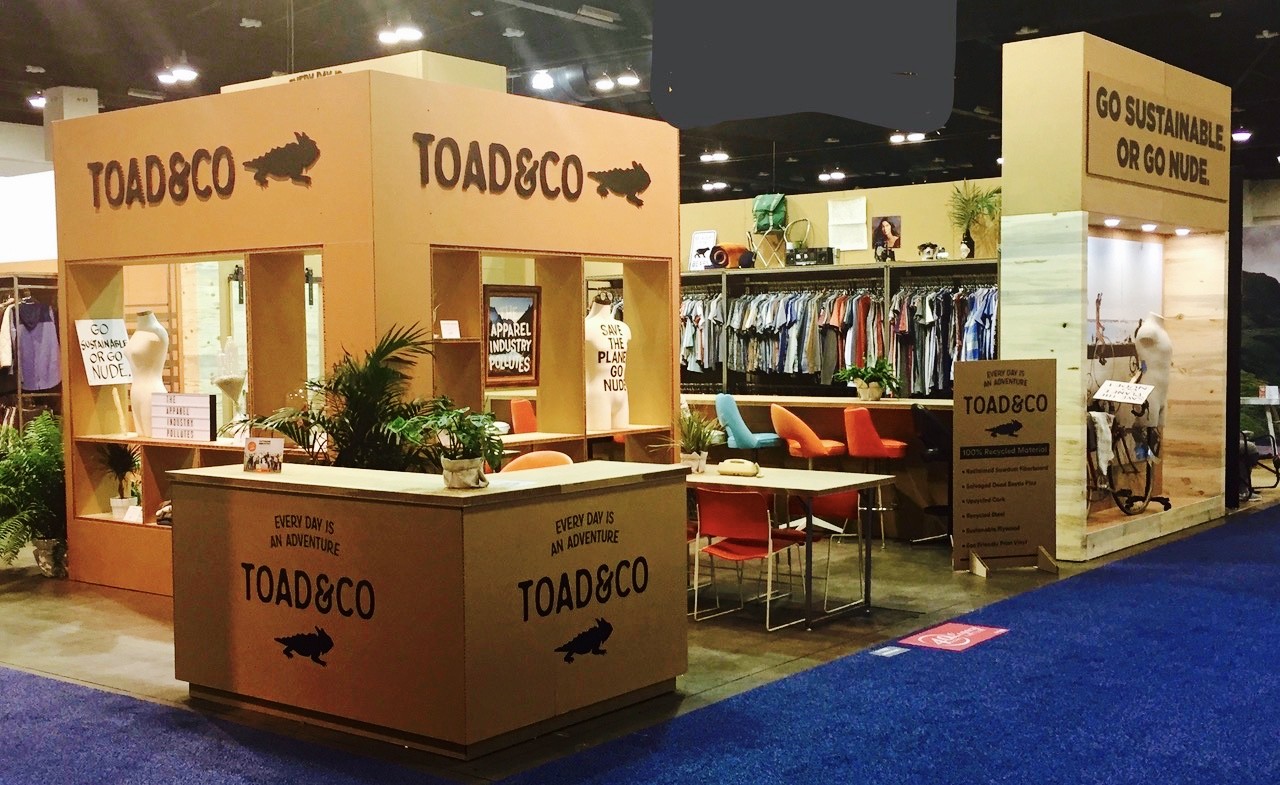
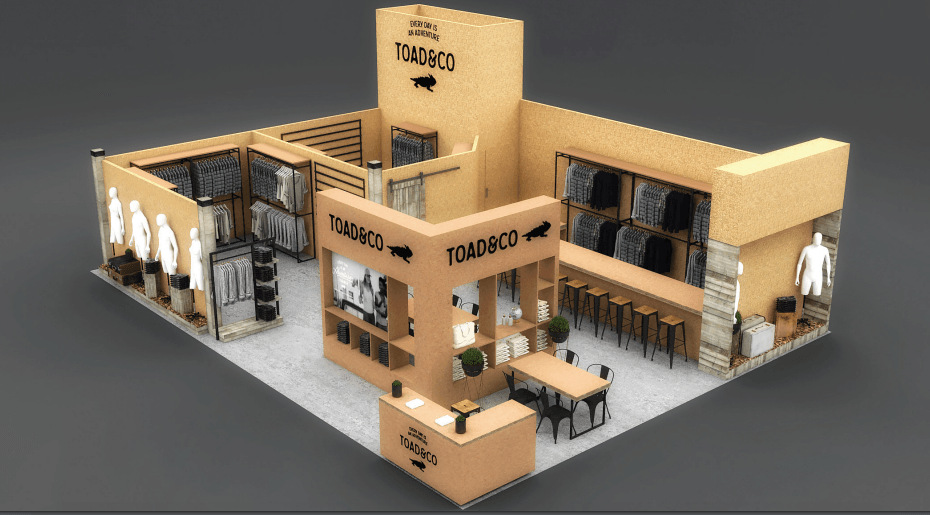
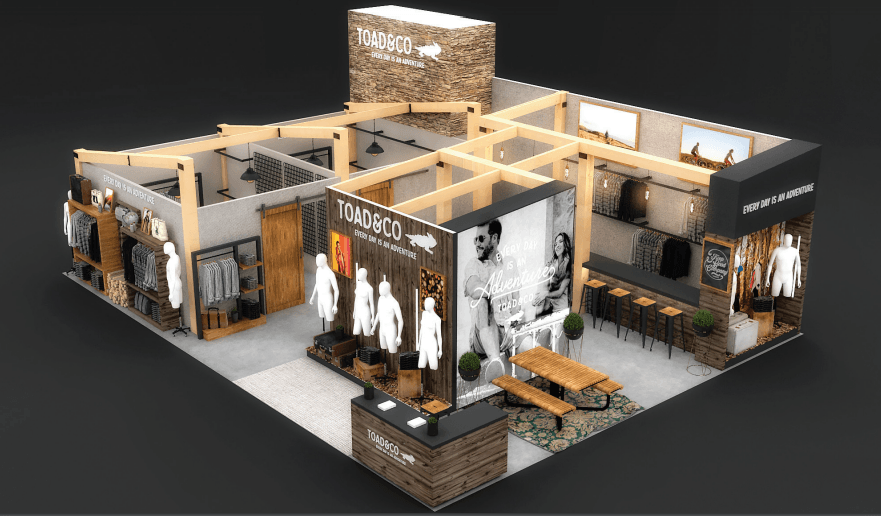
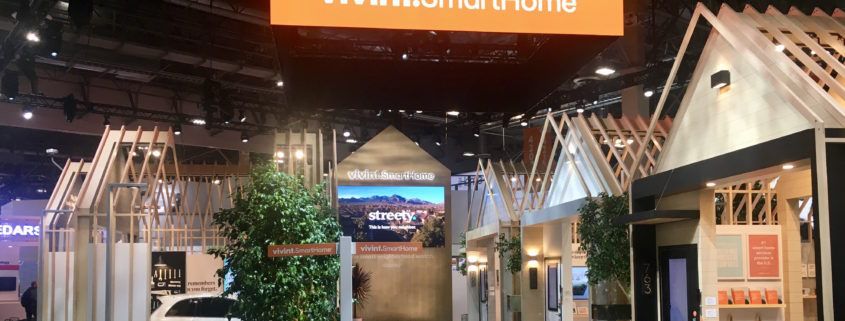
Drumroll please . . . it’s show time! The moment you’ve been waiting for: the time has come for your new trade show booth design to be introduced to the public. This is probably the most anxious yet most exciting part of the entire exhibit booth process. On the one hand, you’re nervous about whether all of the final details will come together once they’re on the trade show floor, but on the other hand, you’re thrilled that it’s finally time for the big reveal. To help calm some of your pre-show jitters, let’s walk through the experience of having a trade show booth at an exhibit.

Shipping

Before we get ahead of ourselves, let’s take a look at shipping your booth and supplies to the show. This is a crucial stage and a chance for you to save some serious time, money, and headache later on. Your booth will be loaded into crates, which are then in turn loaded onto trucks to be transported to the show. Now is the time to rack your brain for anything else you’ll need during the show and get it to the booth company in time to get it on the truck. We can’t stress this enough — catalogs, giveaway items, any non-sensitive products that can travel separately from your employees, even pallets of water bottles to help keep your team hydrated during the show — all of that should be given to the booth company in advance in order to ship it down with the booth.

Why should you do this? First, it saves you time. If you ship it to the exhibit hall separately, that means you and your show team will also have to cart it up from the on-site shipping center to your booth. If you have boxes and boxes of materials for the show, this can take up valuable pre-show time that your team could be devoting to other efforts.

Next, it saves you a lot of money. If you’ve ever had to overnight a 30-pound box of catalogs to an on-site FedEx location, you know what we’re talking about. Those little onesy-twosy shipments add up very fast and cost multiple times more than it would to add a bit of weight to your freight shipment with the booth. Many times, you won’t be charged extra at all for shipping those extra items with the booth. Make your Finance team happy and send as much as possible with the booth.

Finally, it saves you a huge headache. When the day comes for you to fly or drive down to the trade show, the last thing you want is to be stressing over whether you remembered X or forgot Y. Plan ahead, make a list of all of the items that are going to ship with the booth, and then trust your booth design company to get everything there on time. If you work with a full-service company such as mackenzie EXHIBIT, we’ll even put all of your supplies into the storage sections of your booth so that everything is squared away before you arrive on the show floor.

Trade Show Booth Set Up

There are two ways to go about handling the set up of your trade show booth: do it yourself, or let the professionals handle it.

We’ve seen companies go the DIY route in an attempt to save some money, but what they don’t take into consideration is the fact that all of those employees who are being sent down to the show early to handle set up need hotel rooms, per diem budgets, rental cars, and more. It might seem like you’re saving a few bucks by having your own team set up the booth rather than letting the booth company handle it, but in the long run, the added expense of an advance crew plus the dangers of fatiguing your crew before the show even starts end up outweighing any potential benefits. We only recommend going the DIY set up route if your booth is small, maybe around a 10′ x 10′.

The other option is essentially set-it-and-forget-it: let the booth design company handle the set up of your booth. This brings a level of peace of mind to the trade show experience that is priceless. Before the show, you’re already stressed with thinking about the upcoming meetings, interviews, demonstrations, and more — don’t add the stress of having to assemble a booth to your plate.

If you choose to have your booth design company handle set up, they will send a crew down a couple days in advance of the exhibit and have the majority of the booth complete before you even arrive. This way, when you arrive you’ll be able to walk in, make any last-minute tweaks that you’d like, arrange the items you freight shipped with the booth in a way that’s most convenient for you and your team, and you’re ready for the show.

Pre-Show Final Prep

The night before the show, if you had your booth design company handle set up, they will also likely take the time to run a vacuum through the booth and make sure everything is polished up and ready for the public the next day. Take the time to walk through your booth at the very end of the day before the show so that there aren’t any last-minute surprises and you can have confidence that everything will be squared away when you walk in the next morning.

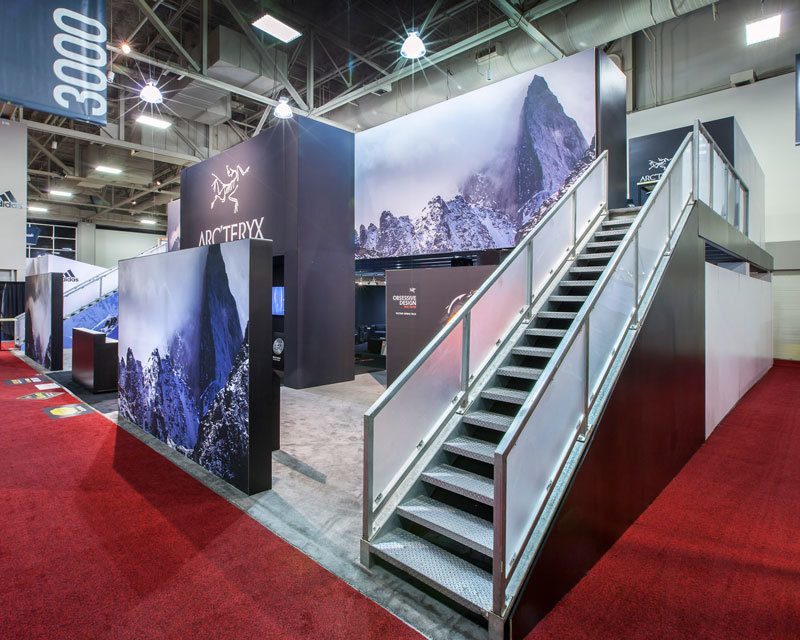
Something to consider having done on the first morning prior to the show opening to the attendees is to have professional pictures taken. Reputable booth companies, such as mackenzie EXHIBIT, will be able to schedule this for you. Having professional images taken of your booth will give you great material for social media posts, blog posts, subscriber email blasts recapping the show, and in-office decoration to proudly display your booth design.

As a final prep before the show opens, make sure your catalogs, giveaways, etc. are stored in a logical method and that you’ve segmented everything out for what day they should be used on, that way you don’t run through your entire stash on the first day of the show. Take the time to pick up water, snacks, and anything else that will help your team make it through the long days ahead on the show floor.

Tear Down Time

You survived! At this point, the show floor has closed to attendees and you’re left with a sense of accomplishment because you actually made it through the trade show.

As with set up, there are two ways to handle tear down: do it yourself, or let the pros take over.

If you decide to handle tear down yourself, rather than be able to triumphantly leave the show floor at the end of the day, you’ll find yourself sitting in the middle of your booth waiting for the crates to be delivered so that you can pack up. The waiting on its own can literally take hours, and there’s no way to know exactly when the crates will arrive. After waiting for who-knows-how-long for the crates to show up, only then can your team begin packing everything away. If this isn’t done correctly, you risk damaging booth segments in transit. Trade show veterans will tell you the demeanor of do-it-yourselfers vs. those who let the trade show booth company handle tear down. The first group looks defeated when the show closes, because they know the work isn’t over yet. The second group gets to gather around for high fives and then march off to go grab dinner and celebrate the end of the show. Which group would you rather be?

Those who let the professionals handle tear down will be able to pull down whatever product needs to travel with company personnel, and the rest will be packed up by the booth company and carefully transported back to their warehouse where it will be waiting for you. Easy!

Post-Show Dust Settling

Chances are your employees stashed some of their personal items in the booth during the show and forgot them there. Or you left non-sensitive products in the booth because you didn’t feel like carting them back with you after the show. Or you have leftover catalogs. Whatever the case may be, you likely have a few things left over that need to be picked up from the booth company’s warehouse.

While your booth company will be patient as you unwind from the stress of the show, try not to leave your items there for weeks on end — this takes up precious space in their warehouse and leads to you forgetting what on earth it was that you left behind. Bite the bullet and try to take care of this step as quickly as possible after the show.


Ta-da — you did it! The show is done, your booth was a success, and you have great pictures to remember everything by. Aren’t you glad you decided to work with a company like mackenzie EXHIBIT? There’s a reason why once companies decide to work with a booth design company rather than handling things themselves, they rarely every go back to their old ways.


We hope you’ve enjoyed this four-part series about the trade show booth design process. If you’d like to read through the other parts, here they are:

Creating a Trade Show Booth Part 1: Ideation

Creating a Trade Show Booth Part 2: Mockup

Creating a Trade Show Booth Part 3: 


Ready to get started or have some more detailed questions on the booth design process? Give us a call at 801-621-7500 or email us here.


Interactive Trade Show Booth Design

Creating a Trade Show Booth Part 3: Walkthrough

Congratulations! You’ve arrived at one of the most exciting stages of the trade show booth design process: the walkthrough. Now is when you’ll see your booth come to life, be able to walk through it (as the name would suggest), and imagine how attendees will experience the final result.

While the ship has likely sailed on making large structural changes at this point (hopefully Part 1 and Part 2 helped you sort out the big ticket items), most of the time you can still make small adjustments such as where certain products are displayed, lighting temperatures, and details like that. Let’s take a walk through the walkthrough and learn a bit more about this particular stage.

What to Expect

The walkthrough is where you really start to get an understanding of what your attendees will experience when they arrive at your booth space. This is also the time when you’ll be able to see just how transparent you’ve been with your trade show booth design company to enable them to create your dream booth. If there’s been cloudy communication, there might still be some things that need to be decided on at this point — but if you’ve been straightforward and detailed with your expectations, prepare yourself for an “oh wow” moment.

When you arrive at the booth design company’s offices, they will have cleared out a patch of warehouse space and literally built your booth. It’s a great feeling to round a corner and BAM, there it is! Enjoy this opportunity to see your vision brought to life for the first time. If some of the wall wrapping isn’t yet on or the lighting isn’t finished, don’t fret — there’s still plenty of time to finalize the details. Think of this as your chance to make sure the big picture is what you want.

Make the Most of It

This is your last chance to make any esthetic tweaks or rearrange an item or two, so make the most of it! Really take your time during the walkthrough — if you’re working with a seasoned trade show booth design company like mackenzie EXHIBIT, they know that this is a crucial stage and will let you take all the time you need.

This is a great time to bring some people along from your own company to act as guinea pigs. Choose people who haven’t been a part of the design process at all so that they have a completely fresh view and then listen to their feedback — there’s a good chance they’ll look at things in a new light and give you some invaluable thoughts to consider.

Once the walkthrough is complete, the booth company will make any final changes and then box everything up to be shipped to the trade show.

Tweaking the Trade Show Booth

Don’t give your trade show booth design company a heart attack by walking in and telling them that you want to move walls or change the entire flow of the booth — those are things that should have been addressed in Part 1 and Part 2.

What you CAN change at this point are esthetic details. If you want a picture moved from one wall to another or want to rearrange the shelves within a storage column, that can be done. A great detail to pay attention to at this point is the lighting: is it the temperature what you want? Is it pointing at what you want to showcase? Take some time to imagine the exhibit hall and space you’re in and think about the surrounding light that your booth is already bathed in and how you want your own lighting to interact.

Also stop to consider the add-ons that will need to go with your booth. Is there room behind the counter for a few stools for your employees to use? Or that corner over there — would a standing table fit well and give some room for sales people to review your catalog with potential clients? Really envision how your trade show staff will utilize this space and think about what will make their lives easier and your clients’ experience more memorable.

Say This not That

As the previous parts in this series have said, be as detailed as possible when giving feedback to your trade show booth design company. Professionals like mackenzie EXHIBIT might have been doing this for a while, but that doesn’t make them mind readers — be honest and open with your first, second, and third impressions as you walk through your booth.

Finally, let’s take one last glance back at that list of three to five crucial things you wanted this booth to accomplish. Did all of those boxes get checked? Hopefully so! If not, speak up and your booth company can tell you what is still within the realm of possibilities.

What’s Next?

We hope you’ve enjoyed the walkthrough process! It is truly one of the most exciting stages of the entire trade show booth design experience.

What comes next is even more exciting: seeing your booth in the wild. Your trade show booth design company will now make any final adjustments that you requested during the walkthrough and will then break everything down, pack it safely into crates, and deliver it to the exhibit hall. If you choose a full-service company like mackenzie EXHIBIT, you’ll also be able to have them set up your booth in the exhibit hall so that the stress on your employees is minimal and you can walk in the day before the show to a beautiful, fully-assembled trade show booth.


Ready to get started or have some more detailed questions on the booth design process? Give us a call at 801-621-7500 or email us here.


10 by 20 tradeshow booth rental

Creating a Trade Show Booth Part 2: Mockup

It’s been a few weeks since your first meeting with the exhibit design company, and you’ve been anxiously waiting to hear that they’re ready for you to review their first mockup of your trade show booth. What should you expect? If you go into the mockup review with the right frame of mind, the right people present, and the right set of goals, you’ll have a productive and successful meeting that will get you a giant step closer to the booth you have in mind.

My Place or Yours?

First, choose whether you want to have the meeting at your own offices or at the exhibit design company’s location. If you’re working with a remote company, teleconference is likely your only option. If the company is local to you, however, there are pros to meeting at either location. If you have a large number of people involved in the trade show process for your company, then having the mockup review at your own offices is likely more efficient. If your event team is smaller and more mobile, then a meeting at the exhibit design company’s offices is a great way to see how their operations are run and get a feel for their workload and capabilities.


TIP: You’ll also need to decide who should be involved in the meeting. Too many people, and it’ll be a circus; too few, and you might miss out on valuable insights. It’s best to include at least one person from the management team for decisions, one person from the team that will be at the trade show itself for practical input, and one person from the design team if you have an in-house graphics department.


When you sit down for the mockup review, don’t expect the first draft to be a Michelangelo-worthy masterpiece. This is meant to act as a general guide to make sure that you and the booth design company are both on the same page — you’re likely to see a lot of black and white line drawings or basic shape renderings to show placement of different booth elements and further discuss the esthetics. You’ll be able to see the bones of your trade show booth, including wall, counter, storage, product display, and table locations. If you have any special features such as a projection wall or interactive display, this will be the time to nail down where you’d like that to be.

Help Them Help You

If you see something that you’d like changed, speak up! Now is the time to convey any alterations you’d like done to the booth design, because from this point forward the booth design company is likely to start placing orders and begin initial building operations for your trade show booth.

When giving input, refer back to the three-to-five-point list we recommended creating in Part 1: Ideation. This list will keep you focused on why you’re attending the trade show in the first place and what you hope to get out of it, which will be the ultimate input needed for your trade show booth design. It’s important to refer back to this list of priorities at each stage of the trade show booth design and execution process to make sure you’re accomplishing everything you’d like to achieve through this booth.

Trade Show Booth Layout

Think through the flow of your booth and how you want attendees to move through the space. Does the design showcase the products you want highlighted? Do you have enough storage for the catalogs, t-shirts, hats, stickers, and any other giveaways you’ll be bringing? What about refrigerators or lighting or even a place for your employees to charge their electronics — do you have enough outlets? These are just a few of the things you’ll want to double check while reviewing the trade show booth mockup.

Another thing to consider is security; does your booth contain sensitive or expensive items that need to be locked up at night? Or should your products be secured to the booth in such a way that attendees can’t potentially take them away as a souvenir? Trade shows are a prime time for products to “walk away” while your employees are distracted — make sure you’re not taking unnecessary risks with the way your products are displayed.

What Comes Next?

Based on how much feedback you gave and how much needs to be changed, you’ll likely have at least one or two more mockup reviews prior to actual construction beginning on your booth. This back-and-forth with the exhibit design company is a crucial time when you can make sure that your ideas and desires are understood so that the end result is the trade show booth you’ve been imagining.

After the mockup reviews comes one of the most exciting parts of the whole process: the walkthrough. We’ll cover that stage in our next blog entry — stay tuned!


Ready to get started or have some more detailed questions on the booth design process? Give mackenzie EXHIBIT a call at 801-621-7500 or email us here.


20 x 20 Tradeshow and exhibit booth

Creating a Trade Show Booth Part 1: Ideation

Exhibiting at a trade show is a big decision — the time, effort, and monetary commitment are all things that you’ve taken into consideration and you’ve decided that this a worthwhile investment in your company’s future. Now that you have the green light to exhibit at the show . . . what’s next?  It’s time to design and create your dream trade show booth that will highlight all of the aspects of your company that set you apart from the competition. A well-designed and executed booth is an amazing opportunity to make your mark and establish yourselves as major players in your industry.

In this four-part Creating a Trade Show Booth series, we’ll review the different stages of booth design, creation, and installation to guide you along the process.

Set Your Budget

The first thing you’ll need to outline is your budget. Having a clearly-defined budget before your first meeting with the exhibit design company will allow you to make smart decisions when it comes to certain elements you want included in the booth. A firm budget will also give your exhibit design company clear parameters to work within so that you both can make the most efficient use of your time. After all, the deadline to ship the booth to the show will be here before you know it!


TIP: When establishing your budget, there are a couple things to consider. First, will this booth be multi-purpose? If your booth pulls double-duty as both a place to display products and to hold meetings, then you won’t need that extra conference room you’ve reserved and can put that extra money toward your booth design. Second, will this booth be single- or multi-use? If you plan to reuse this booth over multiple shows, it might be best to give more wiggle room in your budget for a booth that is able to evolve with your changing needs for each show.


Consider the Space

Now that you know what your trade show booth budget is, let’s start thinking about the physical space you’ll be occupying at the show. If you have a 10’x10’ space, simplicity is key; you’ll likely have a lot that you want to cram into a small amount of square footage, but resist the urge to go overboard. A smaller booth that is stuffed to the gills with product samples or distractions will hinder your company’s ability to clearly define itself to the passers-by.

If you have a larger amount of room to work with, for example a 30’x30’ or bigger, then you can start to get a bit more creative. Does your exhibit hall allow for two-story booths? If so, you might be able to place a meeting space on top of your booth to make the most of your footprint. A larger booth space also allows for on-site storage of catalogs, employee personal belongings such as bags, giveaway items, etc.

Before your first meeting with the exhibit booth design company, give some thought to what you want to include in your booth space from a practicality standpoint. Do you want storage? What about lockable displays? Is meeting space crucial, or is your booth purely to display products? Having a clearly-defined wish list before your meeting will help your exhibit booth design company to understand exactly how to meet your needs.

Trade Show Booth Flow

If you have an in-line 10’x10’ or 10’x20’ trade show booth space, flow isn’t something that you’ll need to consider as much because attendees likely won’t be physically entering your booth. If your booth has depth to it as with a 20’x20’ or larger, you’ll need to think about the path people should take when entering your booth. Do you want to clearly define an entry and exit point so that they travel through the booth on a path, or would you like for them to feel comfortable milling about and taking their time perusing your products?

A defined path is a good idea when you want attendees to follow either a development process or timeline — for example, if you want to show them the different iterations a product went through to arrive at the final result. You can also use this flow method if you want attendees to start out at your more entry-level products and move through up to your higher price point items. Booths with entry and exit points or a defined path require a lot of thought and careful execution, as they can create pinch-points and traffic jams when the show is at its busiest.

A free-flowing booth has a fairly open construction that allows the attendees to enter and exit the space from numerous sides of the booth and is great for companies who want to create a space with a “come in and stay a while” feel. High-top tables where sales people can walk clients through this years’ catalog or a picture wall for attendees to pose with products for Instagram are elements that you can consider incorporating into a free-flowing design.

Remember the Why

Finally, let’s think about the biggest reasons that made you want to exhibit at the trade show in the first place. Is this your company’s big entrance into the market? Have you been in the industry for quite some time, but want to really make a splash now? Do you have a new product that you want to unveil?

Make a list of your top three to five reasons why you want to attend and what your goals are for your trade show booth, and then keep referring back to them as you move through the booth design process to ensure you’re keeping your eye on the prize and focusing on the “why”.

Keep an Open Mind

As you meet with your exhibit design company, keep in mind that they’ve likely been doing this for decades and have learned the tricks of the trade along the way. When you present your initial list of wants for the booth, they might offer a different viewpoint or have some suggestions. Remember that they are offering this input to make your trade show attendance as successful as possible. By combining your dreams with the exhibit design company’s experience, together you can create your ideal trade show booth design.


Ready to get started or have some more detailed questions on the booth design process? Give us a call at 801-621-7500 or email us here.


Preparing for a Trade Show: 4 Crucial Steps

The weeks leading up to a trade show can be exhilarating, stressful, easy, sleep-deprived, or completely relaxed. Every business experiences the preparation stage a little differently. But pretty much anyone who’s exhibited will tell you there is one running constant for every brand at every show: blink once, and the week of the event sneaks right up on you. And if your massive laundry list of to-do items is still massive when the show must go on tomorrow, this means trouble.

We know from experience that there are a few steps you can never skip when preparing for a trade show. These steps will give you the best chance of success and the clearest line of sight to help you see show day from a mile away.

Start Early

When it comes to getting your people ready for a trade show, it’s almost impossible to start too early. Your first steps should include analyzing whether this trade show is the best for your business, and then quickly booking the booth space, starting on the budget, and booking travel if necessary. These steps should be taken care of at a minimum of six months in advance. From there, the show should be kept on the forefront of everyone’s minds – all employees should be part of the process somehow from the very beginning.

Get Organized

Your accountant isn’t the only person that has to have an eye for organization. Keep yourself tidy and task however you can, whether that be mapping out your own task spreadsheet spanning from now until the show, or something small like reorganizing your desk to be able to withstand the influx of trade show product and print materials without becoming overwhelming. At the very least you should create a company-wide comprehensive schedule tracking all timelines and clearly marking every deadline to communicate clearly how you expect to be ready by showtime. Also pay special attention to make sure all exhibit materials are scheduled for a timely delivery — you really don’t want to deal with extra delivery fees once the show has started, so prior planning is key.

Clarify Goals

Company-wide organization is also important for making sure everyone is on the same page when it comes to motive and intention. You have your own reason for choosing to attend this show, but your team might not be aware of it and steer things in a different direction. Start a conversation that addresses the really important questions: Why this show and not another? Who are you targeting and what kind of action do you want them to take? What will have made the show a “success” in your mind? The answers will guide both your team and your exhibit design heavily.

Advertise

Right around the time you’re booking your spot at the show, make sure your customers (and potential customers) know you’ll be attending the show and what they can expect. A couple of months in advance is a great time to announce giveaways, contests, and tease any major launches you have planned for showtime. As long as you stay on top of your advertising efforts and give your target audience time to plan, you’ll be in a good spot and see better attendance because of it.


There are lots of things you can do right off the bat to prepare your company and yourself for a great trade show run. Starting with these will help you (and help us help you) design a killer booth and sow the seeds for a strong presence and flawless execution. If you’d like to get started today, contact us by phone at 1-877-381-9133 (EXT 3), or email us at carmin@nullmackenzie-exhibit.com.